Wednesday, 19 February 2014

A Cake Worthy of a King


The first time I ever tasted King Cake was when I was a student at Centenary College of Louisiana, roughly a month before Mardi Gras. I was already familiar with Mardi Gras, but I had never experienced the delights of the King Cake until then. What a happy day that was.


A King Cake, named for the three kings who visited the infant Jesus, is only available between Epiphany and Mardi Gras. During Mardi Gras season, folks in Louisiana host King Cake parties and the person who finds the baby inside hosts the next King Cake party.  This goes on and on throughout the season and the parties get livelier and more raucous as Mardi Gras approaches. Unfortunately I often start thinking about devouring a piece of King Cake around September which makes the agony of waiting so much worse.

Don’t let the name fool you; a King Cake isn’t what you might normally think of as a proper cake. It’s an enriched bread dough that is traditionally filled with cinnamon and sugar, topped with fondant icing and sprinkled with gold, purple and green sugar. 

You can make this either by hand or with a mixer and it will turn out great.

Ingredients:
For the dough
60g butter
500g plain yogurt or buttermilk
80g sugar
1tsp salt
2 packets of dry yeast (14g)
1tbs sugar
125ml warm water 43C/110F
2 eggs
985g bread flour, divided
1 plastic baby (can be omitted)

For the filling
125g sugar
½tsp ground cinnamon
80g softened butter

For the fondant
480g icing sugar
3tbs melted butter
3tbs full fat milk
½tsp vanilla

For the sugar
Yellow
Green
Purple

Instructions:
To make the cake
  1. Put the first four ingredients into a medium pan over a medium heat until the butter melts. Set aside and let cool to 43C/110F.
  2. Dissolve yeast and 1tbs of sugar with ½ cup of warm water in a large bowl and let stand five minutes until frothy. 
  3. Add yeast and butter mixture to a large bowl and whisk in the eggs. Once combined, add in 280g of the flour and beat for two minutes until smooth. If using yeast that can be added directly to the flour skip this step but add the water and the sugar to the yogurt/buttermilk mixture and the yeast to the flour.
  4. Gradually add the remaining flour to make a soft dough (not sticky)
  5. Turn the dough onto a floured surface and knead for ten minutes until it’s smooth and elastic. You can do this in a mixer with the dough hook as well.
  6. Place the dough into a well greased bowl, cover and place in a warm place for one hour until the dough has doubled in size. 
  7. Knock out the air and divide the dough in half and set one half to the side.
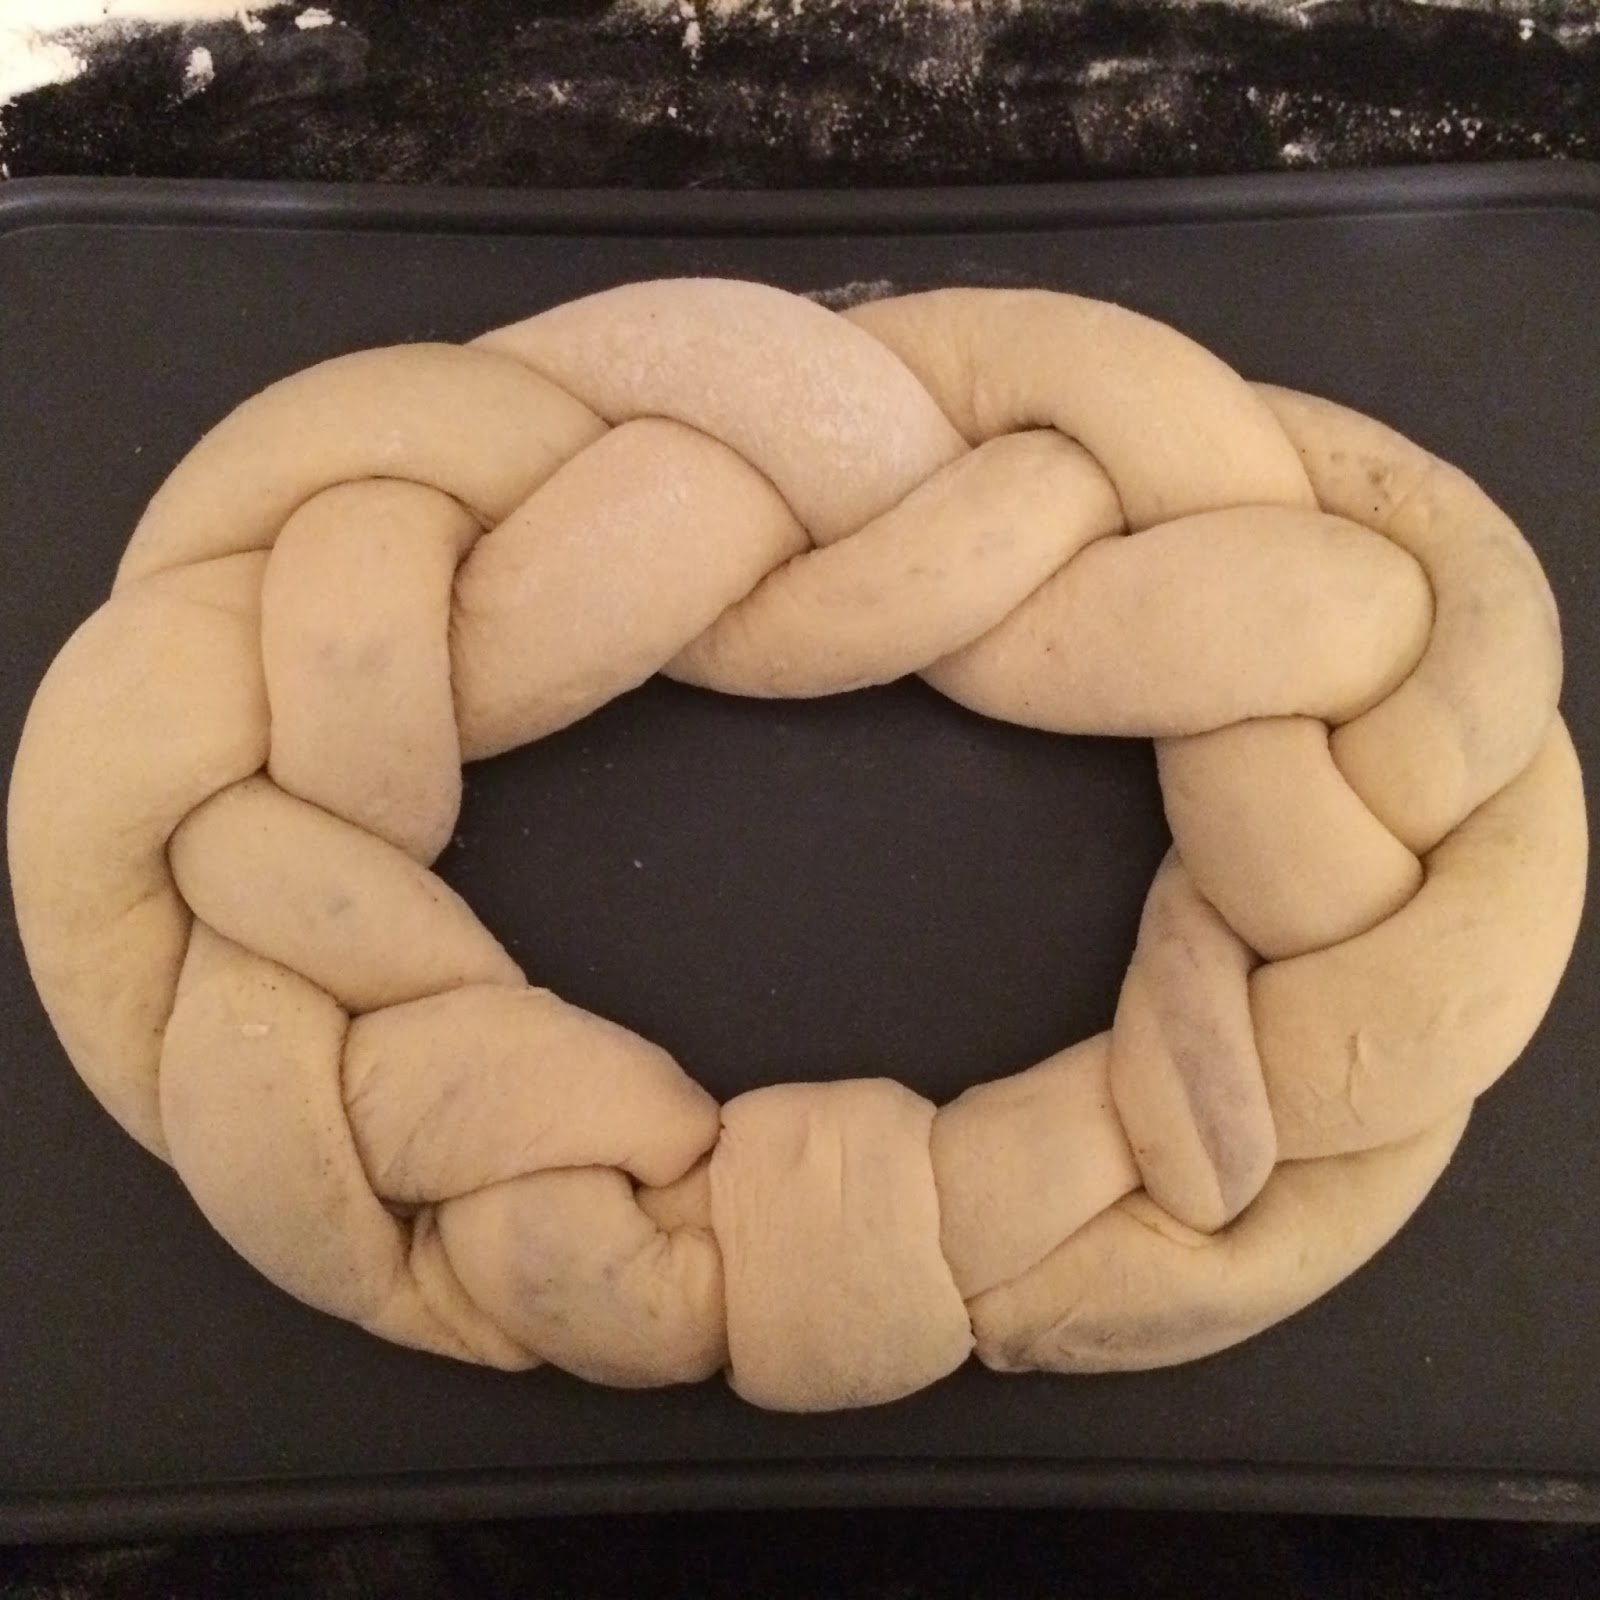
  8. Using a rolling pin, roll out the dough into a large rectangle that is about ½inch/1cm in height. Spread half of the butter over all of the dough and then sprinkle with the cinnamon mixture.  Roll the dough into a tube and then bring the two ends together to firm a circle. If you want to add in the baby you will need to do so before you roll it up.
  9. Place on a baking sheet, cover and set aside for 30 minutes for a second rise. Repeat with remaining half.
  10. Once the dough has risen put into a preheat oven at 190C/375F and bake for 15-20 minutes until golden brown.
  11. Remove from the oven and set on a wire rack and let cool completely.


To decorate the cake
  1. Add the sugar, butter, milk and vanilla to a bowl and whisk until smooth.
  2. Drizzle half the mixture over a completely cooled cake.
  3. Sprinkle the coloured sugars over the fondant in the order of purple, green, and then gold.


As long as the final cake is pulled into a circle you could do pretty much any decorative braiding or twisting to make your King Cake even more impressive.

Wednesday, 29 January 2014

Show-stopping Dr Pepper Cake


If you look through old Southern cookbooks you’ll find an odd ingredient that you really wouldn’t expect to find – Coca Cola. It’s found in both savoury and sweet recipes where it adds a rich caramel depth to the dish. In Texas we do things a bit differently; we use Dr Pepper.


We’re mighty proud of Dr Pepper and that’s because it was invented in Waco, Texas way back in 1885, a full year before the stuff in the red can. Folks usually bake their Dr Pepper cake in a 9x15in pan; however, I prefer to elevate mine to showstopper status by baking the cake in three 9-inch round pans. I sandwich the layers with whipped chocolate ganache and frost the entire cake with either Dr Pepper icing or chocolate buttercream.

There are some strange ingredients that go into this cake but I can assure it will definitely please the most refined palates as well as appealing to any chocoholic you might know. It certainly impressed P when I made this for his birthday when we first started seeing each other – he asks for it every year now.

This recipe is adapted from Baked in America.

Ingredients:

For the cake
340g unsalted butter cut into pieces
350ml Dr Pepper
65g mini marshmallows
85g dark chocolate chopped finely
530g plain flour
115g cocoa powder
1 ½tsp bicarbonate soda (baking soda)
2 ¾tsp baking powder
1tsp salt
600g sugar
80g melted butter
1tbs vanilla
5 large eggs room temp
300ml buttermilk room temp

For the Dr Pepper icing
640g icing sugar
30g cocoa powder
58g butter
120ml Dr Pepper
2tbs double cream
1tbs vanilla extract
1tsp cinnamon

Alternative Frosting – Dr Pepper Cocoa Buttercream
500g icing sugar (sifted)
3tbs cocoa powder (sifted)
117g softened butter

30-50ml Dr Pepper

Instructions:

For the layers
  1. Preheat the oven to 180C/350F. Grease and line three 9inch round pans and set aside.
  2. Add the first four ingredients to a medium sized pan over a medium/high heat until scalding and the butter has melted. Remove from heat and continue to stir until all of the marshmallows have melted. This takes a while. Once fully incorporated, set aside to cool.
  3. In a large bowl sift together the flour, cocoa, salt, bicarbonate soda and baking powder and set aside. 
  4. In a large mixing bowl with the paddle attachment combine the sugar, melted butter and vanilla over a medium speed. Reduce the speed and add in one egg at a time until you have added in all five eggs.
  5. Increase the speed and pour the cooled Dr Pepper mixture into the eggs and sugar and mix until the mixture is a nice even colour.
  6. Add 1/3 of the flour mixture to the bowl and once incorporated add in half of the buttermilk. Add the second third of the flour mixture and continue to mix until just incorporated then add the last of the buttermilk.  Finally add in the last of the flour mixture and continue to mix until just combined. (I often do this last bit by hand to prevent over mixing) Keep in mind that you will have a very full mixing bowl.
  7. Divide evenly between the three prepared tins and place in the oven for 35-40 minutes.
  8. Once fully baked remove from the oven and set on a wire rack and let cool completely.


For the Dr Pepper icing
  1. Combine all of the ingredients except the cream and the vanilla into a medium pan over a medium/high hear.
  2. Bring to the boil and then remove from heat.
  3. Let cool for five minutes and then add in the vanilla and cream.
  4. Stir until the mixture thickens and then pour over the finished cake.
You could add in a handful of chopped pecans, if you like, before pouring over the cake.

To assemble the cake
  1. Gently heat the salted caramel in the microwave to make it loose and easier to spread.
  2. Cut the individual layers in half and cut off any dome that may have risen.
  3. Dab a small amount of the salted caramel on the cake board and apply the first layer.
  4. Add 150g – 250g of salted caramel and spread over the entire top of the layer. Place the next layer on top of the salted caramel.
  5. Continue doing this until you have added the final layer but do not add any salted caramel to the top of this layer.
  6. With an offset spatula smooth out any caramel that has oozed between the layers and then refrigerate for 20-30 minutes to set. 
  7. Remove the cake from the refrigerator and pour over the Dr Pepper icing. Alternatively you could frost the entire cake with chocolate buttercream or pour over a chocolate ganache.
Alternative Frosting – Dr Pepper Cocoa Buttercream
  1. Sift the cocoa and icing sugar into a mixing bowl and add the softened butter. 
  2. Using the whisk attachment slowly mix the ingredients together until they start to combine and the icing sugar is mostly incorporated. 
  3. Turn up the speed and add in 30ml of Dr Pepper and continue to whip until the frosting is fluffy. 
  4. You may need to add in the additional 20ml but be careful not to add to much liquid.


Tuesday, 24 December 2013

Grandma Bea’s Cranberries


One of my favourite dishes for the holidays was my Grandma Bea’s cranberry dish. Not quite a cranberry sauce, but not actually a side dish either – it fits somewhere in between.  I have no idea where she got this recipe and a quick search on Google provides various cranberry salad recipes, but none of them are quite like the one my grandma made.


Like clock work you could depend on grandma to make specific dishes for holiday gatherings and they included: copper pennies, pea salad, and cranberries. I would always load up my plate with the ruby red cranberries pushing the turkey into second place.  When the meal was over and all of the leftovers were piled into the fridge, I always made sure I knew where they were hidden so I could be first to tuck in when the fullness had subsided – usually around 8.00-9.00 at night.

Now that I’m in a place where I want to start my own holiday traditions, I want to make sure my grandma’s memory lives on through this dish.  This year her cranberries will take pride of place alongside the goose I’m roasting and I know it will help make my Christmas special.

Ingredients:
300g bag of cranberries, chopped fine
150g bag of pecan halves, chopped
227g can of crushed pineapple, well drained
1 packet of lemon jelly/o*
1 packet of orange jelly/o*
200g sugar
400g cream cheese at room temp
  1. Chop the cranberries with a sharp knife or blast in a food processor taking care not to blend into a puree. The cranberries need to be somewhat chunky but not so chunky as to have whole or half pieces. Once chopped place in a bowl, cover with sugar and let them macerate for 30 minutes.
  2. Drain the crushed pineapple until almost dry and add to the cranberry mixture. Make sure there is very pineapple juice left because it will prevent the jelly/o from setting.
  3. Chop the pecans into small pieces or blitz in a food processor taking care not to blend until the pecans are crumbs – you want to be able to have some bite. Set aside.
  4. Prepare both packets of jelly/o as per the package instructions using only half of the water and combine with the cranberry and pineapple mixture. Mix in the pecans and pour half of the mixture into a square dish and refrigerate until set. Set aside the remaining mixture in a warmish area to prevent it from setting up.


  5. Place the cream cheese into a bowl and mix well until it is a spreadable consistency. You could add some icing/powdered sugar to sweeten the cream cheese if you prefer.
  6. Remove the set cranberry jelly/o from the fridge and spread the cream cheese evenly on top.
  7. Pour the remaining cranberry jelly/ mixture over the cream cheese and refrigerate until set.

You should have a glistening white layer of cream cheese sandwiched between two layers of deep scarlet jelly/o. Make the dish the day before serving to allow the flavours really amalgamate – make sure to make enough for leftovers!


Monday, 23 December 2013

My Favourite Cornbread


Cornbread is one of those staple dishes in the South and you tend to find yourself in one of two camps: Team Sugar or Team No Sugar. I fall into the Team No Sugar category and I can’t imagine a sweet cornbread ever going well with Texas chili. My view is that if you want sweet cornbread you can add some honey-butter to it, otherwise keep it plain.


Cornbread always reminds me of being at my Grandma Tippi’s house and how she would make this almost every single time I would come over to visit. My granddaddy would get so excited when grandma announced it was nearly ready and he’d hurry to the butcher block so he could get his piece fresh from the oven. He’d crumble a slice into a glass and pour over cold milk and tuck in with great appreciation.

I introduced P to cornbread and although skeptical at first he is a true convert and he’ll even ask me to make it from time to time. It’s such a comforting food and one that I really enjoy making.


Ingredients:
230g corn flour/meal (please don’t use corn starch)
285g whole milk or buttermilk
100g plain flour
1tsp salt
1tsp baking powder
100g melted butter
2 large eggs
2tbs butter for the skillet

  1. Preheat the oven to 200C/450F and place the skillet inside.
  2. Place the corn flour and milk in a bowl and set aside for 30 minutes.
  3. Mix the flour, salt and baking powder in a separate bowl.
  4. Add the eggs and melted butter to the corn flour mixture and mix well.
  5. Add the flour until just combined.
  6. Add the 2tbs of butter to the hot skillet and let melt.
  7. Add the cornbread mixture to the skillet and bake for 25 -30 minutes until golden.


You don’t have to soak the corn flour with the milk, but I find it makes the final bake softer. Of course, that could just be my imagination.

For those of you unused to cornbread you’ll find it’s more cake like than bread like, but it’s definitely not cake. Enjoy with chili con carne or add to cornbread dressing.